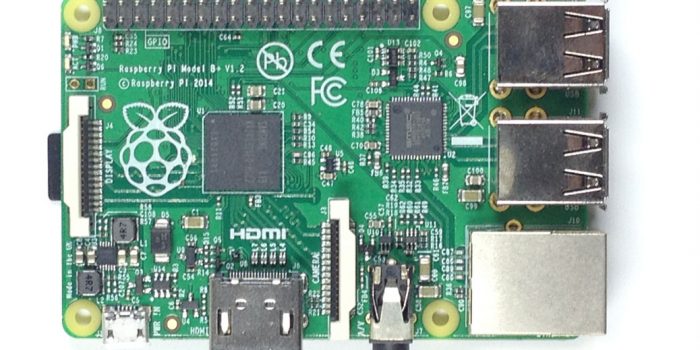
There are a huge number of tutorials on the Net, showing you how to set up your Raspberry Pi – but, briefly, the process I went through was:
Basic set up
- Set up your Raspberry Pi OS, and boot the Raspberry Pi up.
- After booting up your Raspberry Pi with a freshly configured card, the new on-screen setup process will take you through most of the following. But you can also set them manually:
- Open the config menu (in the GUI: Raspberry Menu > Preferences > Raspberry Pi Configuration)
- Timezone: In the ‘Localisation’ tab, click ‘Set Timezone…’ to select your Area and Location.
- Change password: In the ‘System’ tab, click ‘Change Password…’ and change it from the default password of ‘raspberry’
- Boot: Also in the ‘System’ tab, in the ‘Boot’ section, select ‘To CLI’ (generally my projects run from the Command Line Interface, not the ‘Desktop’ graphical user interface)
- Secure connection: In the ‘Interfaces’ tab, in the ‘SSH’ section, tick ‘Enabled’.
- Update the system software and firmware to the latest versions by running the following Terminal commands (launching Terminal from the GUI‘s menubar):
sudo apt update
sudo apt full-upgrade
- Open the config menu (in the GUI: Raspberry Menu > Preferences > Raspberry Pi Configuration)
- Open the config menu (in the GUI: Raspberry Menu > Preferences > Raspberry Pi Configuration)
- Boot: Also in the ‘System’ tab, in the ‘Boot’ section, select ‘To CLI’ (generally my projects run from the Command Line Interface, not the ‘Desktop’ graphical user interface)
- Secure connection: In the ‘Interfaces’ tab, in the ‘SSH’ section, tick ‘Enabled’.
- Reboot the Pi: (in the GUI: Raspberry Menu > ‘Shutdown …’. In the pop-up window, click the ‘Reboot’ button.
Editing from a Mac
It was much easier to use my Mac to edit the Pi’s python scripts, than to edit them on the Pi.
I connected to the Pi in two ways – but first, check the ‘Raspberry Pi Configuration’ window, in the ‘Interfaces’ tab, to make sure that ‘SSH’ is Enabled.
- On the Pi, check its IP address:
ifconfig
- Launch the Terminal application on the Mac, and connect to the Pi’s username and IP address, e.g.:
ssh pi@192.168.0.15
or, if you’ve set up a unique hostname for your Pi, you can use that. E.g.:
ssh pi@teamtrack.local
- Use the Mac’s Finder to mount the Pi’s volume:
- Install Netatalk, using the Pi’s Terminal command (a one-time setup):
sudo apt-get install netatalk
- A recent change means you now have to edit the afp.conf file to define a home directory. Full instructions are at: How to Setup a Raspberry Pi AFP Server
- From the Mac Finder’s ‘Go’ menu, select ‘Connect to Server…’
- Enter the Server Address, e.g.:
afp://192.168.0.15
or, if you’ve set up a unique hostname for your Pi, you can use that. E.g.:
afp://teamtrack.local
- Enter the username (default is ‘pi’), and the system password you set in the ‘Basic Setup’ section.
- Click the ‘Connect’ button.
- Install Netatalk, using the Pi’s Terminal command (a one-time setup):
The Pi then mounts as a normal volume, and you can edit the code in your favourite editor.
Set up WiFi
- Set up WiFi if you will be using it, and note the IP address (initially set up on a standard home network, but later I set it up for Edinburgh University’s eduroam).
- If the Pi will be connecting to an external web host (as with the Photo booth) make sure you set up Public Key Authentication so the python scripts can log in and upload to your web host.
Set up camera module
If you will be using the camera module:
- Activate the camera module:
- Plug in the camera module (be careful of static damage).
- Open the config menu.
- Switch to the ‘Interfaces’ tab.
- Set ‘Camera’ to ‘Enabled’.
- Click ‘OK’.
- Agree to reboot.
- Test the camera, with the following Terminal command to save a short video clip in your ~/Documents directory:
raspivid -o ~/Documents/vid.h264
If you get error messages instead of an image on the screen, see ‘troubleshooting’ below.
Troubleshooting the Camera Module
At one point the camera module stopped working, with the following error message:
mmal: mmal_vc_component_enable: failed to enable component: ENOSPC
mmal: camera component couldn't be enabled
mmal: main: Failed to create camera component
mmal: Failed to run camera app. Please check for firmware updates
I was sure I’d killed it with static … but after a bit of searching online, I found all that had happened was the small brown ‘SUNNY’ connector on the front of the camera module had come loose. Seating that connector back in got the module working again.

